之前j2ee项目中实现全文索引一直是用Lucene,这次准备使用Solr来实现。
1、下载Solr,本文所用Solr版本是4.10.4,下载链接:solr-4.10.4.zip、solr-4.10.4.tgz
2、在Eclipse里新建一个web工程,将solr解压缩,把其中的dist/solr-4.10.4目录复制到工程目录下。
3、在本地硬盘上任意建立一个目录用作solr的工作目录(solr/home),在工程的web.xml里修改相应的配置项指向这个目录:
<env-entry>
   <env-entry-name>solr/home</env-entry-name>
   <env-entry-value>C:/my/solr/home</env-entry-value>
   <env-entry-type>java.lang.String</env-entry-type>
</env-entry>
上面的方式相当于“写死”了solr/home,对开发部署不是很友好。为了解决这个问题,我们可以使用jndi配置solr/home,在tomcat的server.xml里:
<Context docBase="com.my.solr" path="/solr" >
<Environment name="solr/home" type="java.lang.String" value="/my/solr/home"/>
</Context>
4、将解压缩目录里的example/multicore目录复制到solr的工作目录。
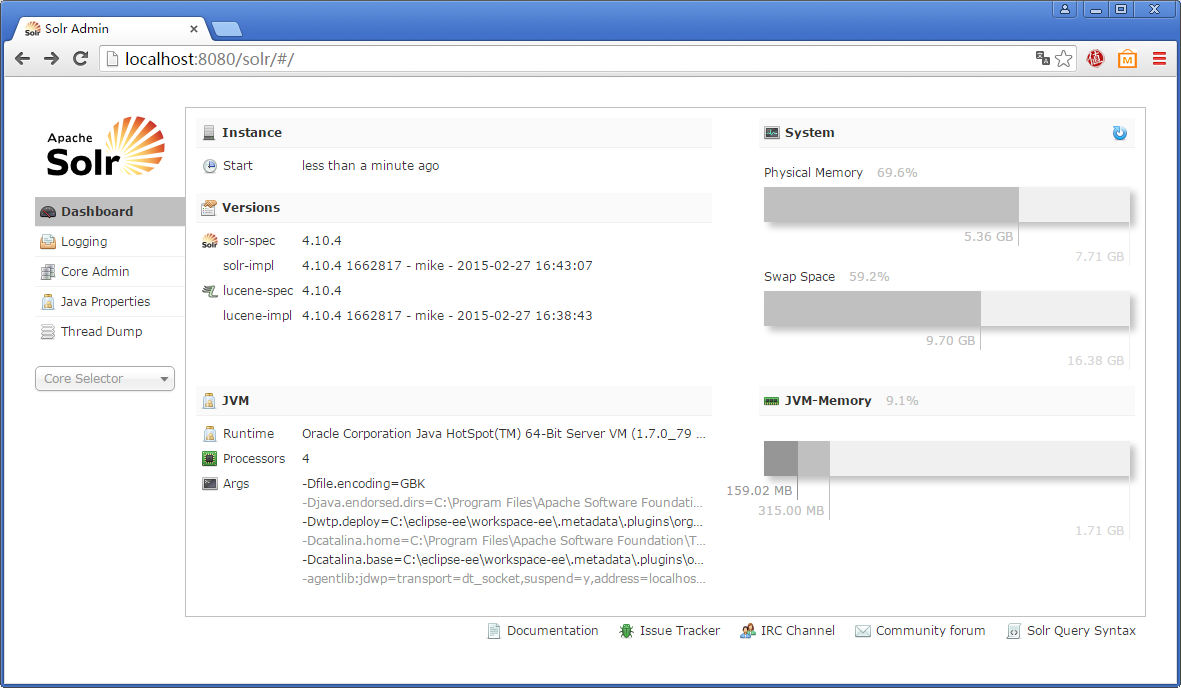
5、启动tomcat,用这个地址试试能否访问solr的管理控制台:http://localhost:8080/solr/。
如果启动时报找不到类的错误,可能需要把slf4j和commons-logging这两个jar包添加到WEB-INF/lib下。
配置中文分词(mmseg4j)
1、Solr 4.10.4对应mmseg4j的版本是2.2(注意区分,mmseg4j 2.3版支持的是solr 5.0),下载并解压缩得到mmseg4j-core-1.10.0.jar和mmseg4j-solr-2.2.0.jar两个jar包文件,复制到工程WEB-INF/lib目录下。
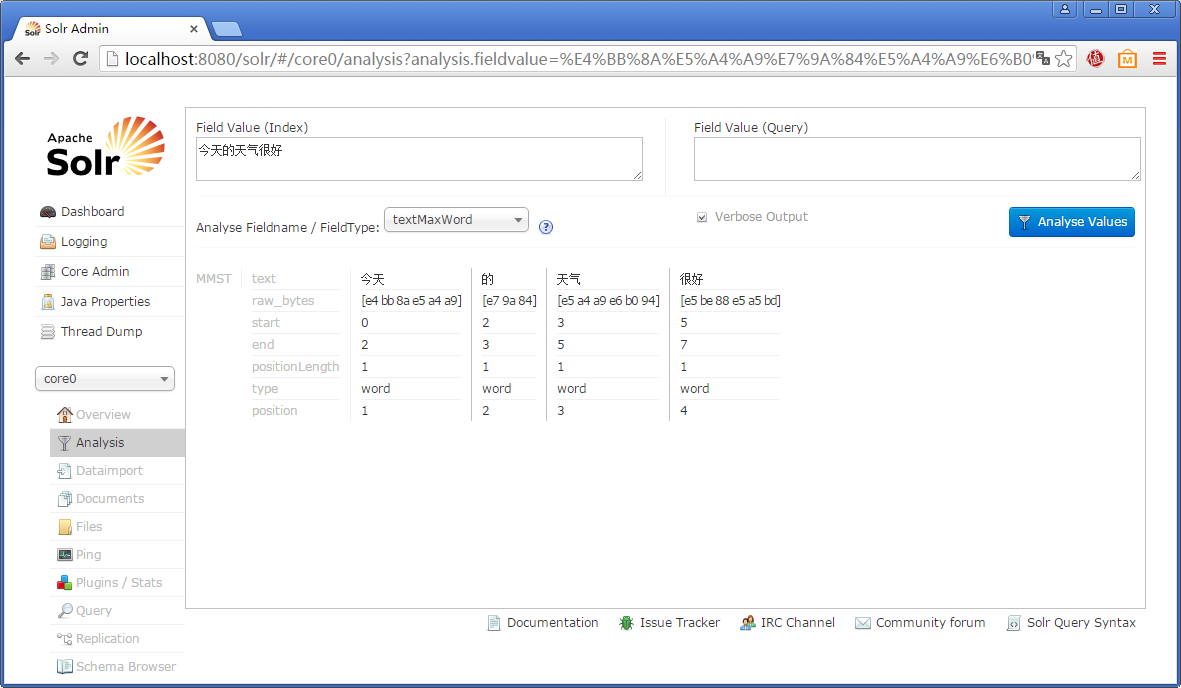
2、修改solr的schema.xml文件,添加支持中文分词的字段。mmseg4j提供了三种分词模式:simple, complex和maxword,所以这里添加三个字段类型。
<!-- mmseg4j -->
<fieldtype name="textComplex" class="solr.TextField" positionIncrementGap="100">
    <analyzer>
        <tokenizer class="com.chenlb.mmseg4j.solr.MMSegTokenizerFactory" mode="complex" dicPath="dic"/>
    </analyzer>
</fieldtype>
<fieldtype name="textMaxWord" class="solr.TextField" positionIncrementGap="100">
    <analyzer>
        <tokenizer class="com.chenlb.mmseg4j.solr.MMSegTokenizerFactory" mode="max-word" />
    </analyzer>
</fieldtype>
<fieldtype name="textSimple" class="solr.TextField" positionIncrementGap="100">
    <analyzer>
        <tokenizer class="com.chenlb.mmseg4j.solr.MMSegTokenizerFactory" mode="simple" dicPath="n:/custom/path/to/my_dic" />
    </analyzer>
</fieldtype>
从1.9(?)版开始,mmseg4j的jar包里已经包含了基本词库。上面的配置里,dicPath指定的是扩展词库所在路径(不是必须项),可以用绝对路径,也可以用相对路径(相对solr home的路径)。
在Solr admin里验证一下分词是否生效。
使用DataImportHandler与MySQL集成
参考:Data Import Request Handler - from Solr Wiki
1、把solr自带的solr-dataimporthandler-4.10.4.jar和solr-dataimporthandler-extras-4.10.4.jar这两个文件复制到j2ee工程的WEB-INF/lib目录下。
把mysql驱动mysql-connector-java-5.1.21-bin.jar也复制到WEB-INF/lib目录下(如果缺少了这个文件,执行全量导入时导入数量是0但不会报错,比较坑)。
2、修改solrconfig.xml文件,添加如下内容:
<requestHandler name="/dataimport" class="org.apache.solr.handler.dataimport.DataImportHandler">
    <lst name="defaults">
      <str name="config">data-config.xml</str>
    </lst>
  </requestHandler>
数据源信息可以直接定义在solrconfig.xml里,也可以定义在独立的data-config.xml文件里。下面是一个data-config.xml例子:
<dataConfig>
    <dataSource type="JdbcDataSource"
        jndiName="java:comp/env/jdbc/rushy" encoding="UTF-8" />
    <document>
        <!-- Root entity -->
        <entity name="discount"
            query="select id, old_price, old_price_time, new_price, new_price_time, product_id from t_price_change">
            <!-- column: column name in MySQL; name: column name in Solr -->
            <field column="id" name="c_id"/>
            <field column="old_price" name="c_old_price"/>
            <field column="old_price_time" name="c_old_price_time" />
            <field column="new_price" name="c_new_price" />
            <field column="new_price_time" name="c_new_price_time" />

            <!-- Embed entity -->
            <entity name="product"
                query="select id, name, image_url, store_given_id, last_price, last_price_time, lowest_price, lowest_price_time, lowest_price_time_latest, store_id from t_product where id=${discount.product_id}">
                <field column="id"  />
                <field column="name" />
                <field column="image_url" />
                <field column="store_given_id" />
            </entity>
        </entity>
    </document>
</dataConfig>
注意上面的例子里,dataSource也是jndi定义的,这需要在<Context>里配置数据源的信息(与solr/home的jndi定义并列),例如:
<Resource auth="Container" driverClassName="com.mysql.jdbc.Driver" logAbandoned="true" maxActive="100" maxIdle="30" maxWait="10000" name="jdbc/mydb" password="mypassword" removeAbandoned="true" removeAbandonedTimeout="60" type="javax.sql.DataSource" url="jdbc:mysql://localhost:3306/mydb?characterEncoding=utf8" username="root"/>
3、配置schema.xml
将需要导入solr的字段定义在schema.xml里,例如:
<!-- solr internal -->
fieldtype name="string"class="solr.StrField" sortMissingLast="true" omitNorms="true"/>
fieldType name="long" class="solr.TrieLongField" precisionStep="0" positionIncrementGap="0"/>
fieldType name="int" class="solr.TrieIntField" precisionStep="0" positionIncrementGap="0"/>
fieldType name="double" class="solr.TrieDoubleField" precisionStep="0" positionIncrementGap="0"/>
fieldType name="date" class="solr.TrieDateField" precisionStep="0" positionIncrementGap="0"/>

<!-- mmseg4j -->
...

<!-- my app -->
<field name="c_id" type="int" indexed="true"stored="true"multiValued="false" required="true"/>
<field name="c_old_price" type="double" indexed="false"stored="true"multiValued="false" />
<field name="c_old_price_time"type="date" indexed="false"stored="true"multiValued="false" />
<field name="c_new_price" type="double" indexed="false"stored="true"multiValued="false" />
<field name="c_new_price_time"type="date" indexed="true"stored="true"multiValued="false" />
<field name="p_id" type="int" indexed="false"stored="true"multiValued="false" />
<field name="p_name" type="string" indexed="true"stored="true"multiValued="false" />
Solr内置的数据类型参考:Solr Field Types
注意:如果导入时发现failed记录很多,可能是schema.xml里定义了required字段但在dataConfig的entity里没有定义,请仔细检查。
注意2:如果要修改schema.xml,需要清除原有数据(提交下面的请求),然后重启solr:
<delete><query>*.*</query></delete>
<commit/>
4、将MySQL里的数据导入到Solr
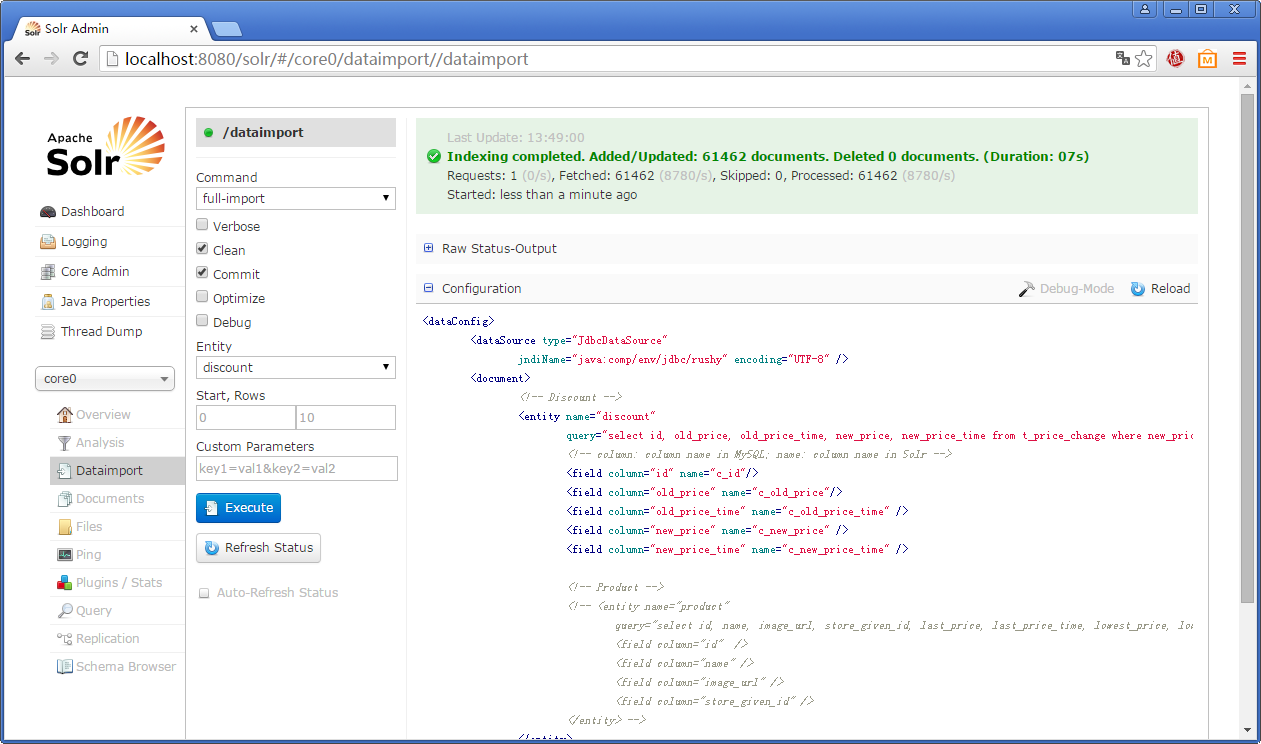
DataImportHandler配置好以后,可以在solr admin界面里直接操作全量或增量导入数据:
也可以在浏览器里访问solr提供的接口调用:
当前状态(例如:导入进度):访问http://localhost:8080/solr/core0/dataimport
全量索引:访问http://localhost:8080/solr/core0/dataimport?command=full-import
增量索引:访问http://localhost:8080/solr/core0/dataimport?command=delta-import
关于索引速度,普通配置的开发环境下,单表索引速度约为10000条/秒,有一个关联表的情况约为2000条/秒。
请保留原始链接:https://bjzhanghao.cn/p/41